Tag Archives: baking

It’s Hot Hot Hot! Chili & Corn Bread

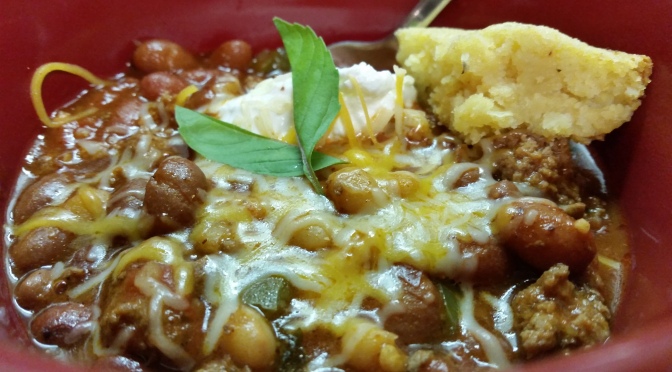
I’m so ready for the cooler Autumn weather that I felt like making a huge pot of rib sticking chili. Yum!                                       And the fact that chick #3 is now suffering from the same illness I had a week ago, gave me the perfect excuse – ehem, opportunity, to make it.

My chili is never made the same way twice because I always manage to add to it or take something away from it. I suppose it just depends on the mood I’m in. But no matter whether it’s a white chicken chili or hearty meat chili, it’s always lip smackin’ good and it’s the one meal I know everyone will eat without complaint.

I’m not normally a spicy chili gal but tonight’s chili had a bit of a kick to it. You can omit the red peppers and hot sauce if it’s too hot for your pallet or turn it up a notch by adding more of your personal choice hot and spicy items.

wpid-20150902_201000.jpg

Chili

Ingredients:

1 to 1.5 lbs ground beef. (I also like to use stew beef chunks and pork chunks for a more meaty chili)

3 – 15.5 oz cans of beans.  (I used white navy beans, red beans, and chili beans)

1 large can diced tomatoes with green chilis

6 oz tomato paste

1 cup diced green pepper

1/2 cup diced onions

1/2 cup diced fresh tomato

1 tbsp. finely diced garlic

1/3 cup hot sauce

1/4 cup chopped chili peppers or other hot peppers

1 chili mix packet

2 cups water

Sour cream

Shredded cheddar cheese

Seasons: salt, pepper, crushed red pepper, and fresh basil. Other seasons per personal taste.

Directions:

Brown ground beef, chili seasoning packet, chili peppers, onions, and garlic in a large pot on medium heat. Drain meat when finished.

Add the cans of beans and diced tomatoes to the meat. Do not drain.

Add the green pepper, tomatoes, and tomato paste. Mix well. Add the water and hot sauce. Stir everything together, making sure that the paste isn’t lumpy. Add seasons – as much or as little as you like. I added about 4 chopped basil leaves, too.

Let the chili simmer covered on medium low for about 1 hour. Stir occasionally to keep from sticking. If your chili get’s too thick, add a little more water. If it sticks, decrease the heat.

Serve with a dollop of sour cream and shredded cheddar cheese on top.

Garnish with a basil leaf
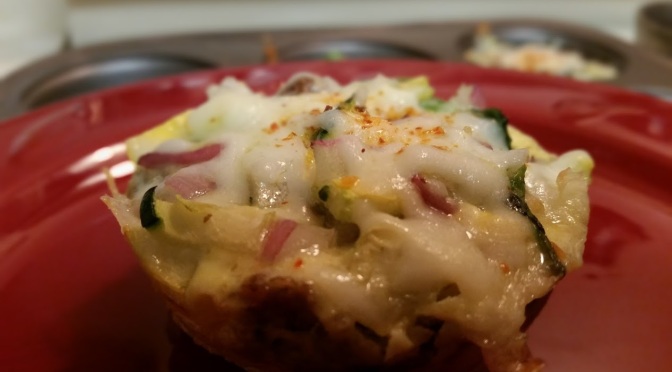
____________________________________________________________________________________________________

Creamed Corn Bread

While I love corn bread, there is nothing worse than eating dry, crumbly, and bland cornbread. And I absolutely do not enjoy the lard taste of cornbread cooked in a cast iron skillet. No sir. Not me. This recipe came about as an experiment that spun from making a traditional corn bread pudding casserole one Thanksgiving. It was an experiment of success and I’ve been making my corn bread this way ever since.  It’s simple with only 4 ingredients and it’s very moist.

Preheat oven to 400

Ingredients:

1 box Jiffy Corn Muffin Mix

1 large egg

1 – 14.75oz can creamed corn

2 tbsp. fresh diced red bell peppers or 1 tbsp. Pinch Perfect “Roasted Garlic and Bell Pepper”

Directions:

In a mixing bowl, mix everything together. The cornbread mix will still have some small lumps.

Pour mixture into a sprayed or greased 8″ pan. This will also make about 6-8 muffins. Fill muffin tin 1/3 full.

Bake 30 minutes. ( I add 10 minutes to the Jiffy instructions due to the creamed corn)

The corn bread will be lightly browned when done and a tooth pick will come out clean.

This corn bread is more dense than a traditional corn bread and it is also very moist.

Hope you like!

~ SE

Loaded Baked Potato & Chicken Casserole

wpid-2015-08-30-21.31.25.jpg.jpeg

This is a super simple recipe that you can find just about anywhere. “OK, Google…” Btw, I love doing that to my daughter when she’s on her tablet. Hahaha!

Anyway, I had about a 1/2 bag of red potatoes I needed to cook up and some chicken breast I had already defrosted. So I decided to try this out.

Instead of typing out the recipe, I’ve provided a link here: Loaded Baked Potato & Chicken Casserole

The chicks loved this so much that they didn’t leave a single potato for my lunch tomorrow!

Bon appetit!

~SE

Mini Breakfast Casserole

I’m not one for pre cooking meals, so this is a first breakfast for me. And I am extremely pleased with the results.

I’m always rushing in the morning but since my morning commute is about 45 to 50 minutes, I don’t really want to entertain the idea of getting up any earlier than necessary. I give myself close to an hour and usually, I’m good on time but if I add in anything else, such as preparing breakfast, I’m no go good at all and spend the next 45 minutes flying like a bat out of hell through the country roads of southwest Georgia. And let’s just say, I don’t like that any more than getting up any earlier. Especially since the country roads are an invitation for not just the droves of wild critters and dear that like to play dodge car but also for the oversized harvesting combines and other farming tractor type machines that clog up the single lane roads. Welcome to the land of cotton, tobacco, soy beans, and peanuts.

Anyway, recently I’ve found that I really do need to eat something in the morning. Sooo – I cheated. I bought Kellogg’s prepackaged egg, bacon, and cheese on flatbread breakfasts. They’re good and in 1.5 minutes, I can be out the door on time and not have to worry about the local po po chasing down this beetle driving speed racer. But…it gets costly and really, I don’t need to be that lazy.

So, I tried something new. I love cooking and I absolutely love experimenting. Put the two together and one never knows what combinations will surprise the pallet…or any other one of the senses. I like trying new things but I am also very sensitive to how pleasing the whole package is through taste, texture, smell, and colors. Occasionally, I bomb but not this time.

What did I prepare? Rather than make a panned breakfast casserole, I made individual serving sizes. Eggs are easy and when done right, they’re super tasty, fluffy, and filling.

This creation was my own so I don’t have a formal recipe to copy or link to share. You’ll just have to bare with me as I try to provide measurements because I barely measure anything. Hahaha!

Getting started:

Preheat oven to 350

You’ll need 1 cooking sprayed regular sized muffin pan, 4 eggs, 1/4 cup milk, 1 cup chopped veggies, (I used a combination of spinach, zucchini, yellow squash, red onion, and green pepper. I was out of tomatoes. ) 2 pieces of bread ripped into small pieces, 1 cup loose sausage  (crumbled and cooked), seasons, and about a 1/3 cup of shredded cheese. Oh! and a 1/4 tsp. of corn starch. I’ll get to why in a sec.

Prep:

I have a mini individual sized Farberware blender and I LOVE it! It’s ama-zing! But if you don’t have a blender, you can whisk your eggs and they’ll be just fine. Put the 4 eggs, salt and pepper, and milk together…and then sprinkle the cornstarch on top. Blend on high for about 20 seconds or whisk vigorously until well mixed with no lumps from the egg whites -yuck. Why the cornstarch? I recently saw a video from Alton Brown (Camp Cutthroat) where he explained that using cornstarch keeps your eggs from forming a puddle of water on your plate. I never thought to use cornstarch. But, hey – it works!  Set the eggs aside after blending everything together.

Cook up the sausage so that it’s in small crumbles and just barely done. Drain and set aside. You can use any loose sausage you like but my personal, lip smacking preferences are either Jimmy Dean’s maple or sage flavors. Drain excess grease and set aside.

Finely chop up the veggies, mix together, and set aside.

Putting it all together:

Now that you have everything prepped, drop a few pieces of bread into each muffin round. Next, sprinkle the sausage on to the bread. Then, add the veggies. And lastly, pour the egg mixture over the veggies. You’ll have enough mixture to fill each spot approximately 2/3 of the way. I would recommend adding a little bit of the egg mixture to each spot first and then slowly add more to each as needed. Once you’ve finishing filling the muffin tray, pop it into the preheated oven for about 15 – 17 minutes. In the last two minutes, sprinkle cheese on top and garnish with fresh basil or a colorful season blend, such as McCormick’s Roasted Garlic and Bell Pepper blend. Return to the oven for the last two minutes. Remove from the oven, let cool, and then enjoy. They’re like mini quiches or frittatas but with a twist and I couldn’t be happier with the finished product!

Mmmmm! I might have to sneak one for a midnight snack!

~SE

Weekly Photo Challenge – New!

I’m definitely more than a novice in the kitchen. However, baking has become a challenging new for me and this was my first homemade pie EVER!

Here’s to NEW kitchen adventures in 2015!

unnamed

<a href="New” title=”Weekly Photo Challenge: New”>

Baked Goodies, Oh My!

So here I am. It’s 11 days until Christmas. And I decided against my better judgment to bake goodies for the folks at work.

Holiday Baking

I say this because, as I’ve previously mentioned, baker extraordinaire, I am not. Oh, I can make some mean cookies. Whip up some tasty muffins. And even bake a lovely cake. But those are very basic and when they come from a box, they’re pretty fool proof, too. IE Sheila Proof.  However, today I decided to try some new recipes…from scratch. Oh boy. That’s a recipe for disaster but I thought, what the heck. I’ll try something new…how about 6 somethings new! Hey, just call me risky.

Anyway the 6 new recipes:

~ Saltine Toffee Bark    http://www.rachaelray.com/2014/02/crazy-addictive-saltine-toffee

~ Soft Coconut Macaroons http://www.tasteofhome.com/recipes/chewy-coconut-macaroons

~ 10 Cup Cookies http://www.tastebook.com/recipes/771823-10-cup-cookies

~ Swirled White and Milk Chocolate Bark with Crushed Peppermint on Top http://www.marthastewart.com/296273/basic-bark#Chocolate%20Bark%20Recipes|/1043580/chocolate-bark-recipes/@center/1008647/christmas-candy-recipes|296273

~ Iced Chocolate Chip Cookie Cake http://sallysbakingaddiction.com/2014/03/18/chocolate-chip-cookie-cake/

~ Buckeyes http://www.jif.com/recipes/details/392


Several years back, a friend made the Saltine Toffee Bark and I just couldn’t get enough of it. So I figured why not begin here? Good grief! This recipe is pretty simple. Lay the crackers on a cookie sheet, cover them with the brown sugar toffee and then bake. This is where my issues began. Sometimes I just don’t think things through clearly and being that I’m not a savvy candy maker, I clearly was not thinking when I laid out the crackers on a side less cookie sheet. Crackers on a cookie sheet are fine but when the crackers are covered in a sticky brown sugar mixture, the whole mess begins to bubble when it’s in the oven. And yes. That’s where my troubles really began. The bubbling caused the crackers to shift closer to the edges and soon enough, I had not just one nor two but 4 crackers and oozing toffee goo running over the sides and down to the bottom of my once clean oven. Are you kidding me?!! And as I stared, helpless, the glob of cracker goop, ignited!! Now mind you, we’ve had to have our oven repaired twice since July and in my defense, neither was due to anything that I did or did not do while cooking. All I could think of as I whipped open the oven door, revealing a miniature ball of fire, charred crackers, and a syrupy mess, was “Oh $shit! I did it THIS time! There’s no way the landlord is ever going to believe this!” Chick #3 sat in horror as smoke billowed out of the oven and when she saw I had it all under control, she smirked, “I told you to use the pan with the sides.” Thank you very much, Captain Obvious. And in spite of this minor mishap, the Toffee Bark came out perfecto.

Now, Chick #3 had a blast bustin’ my chops all day about my goo gone bad incident. She’s become quite the cook lately and never misses the opportunity to tell me when I’m doing something wrong in the kitchen. “Mom! Don’t lick the spoon. Mom! Don’t eat the dough. There’s RAW EGGS in it! Mom! Follow the directions! Mom! Mom! MOM!!” Ugh!! So when we went to ice the last dessert dish, the chocolate chip cookie cake, I almost fell over in a fit of laughter. Liv insisted on making the cake and wanted to ice it with a homemade butter cream icing. Cake done. Cake cooling on racks. Now for the icing. Again, I’ve never made homemade icing. So I’m completely clueless about the texture and consistency. Like the amateur I am, I know when I’m in over my head. So I bowed out and let Liv make the icing. Next thing I know, she’s got the icing in a bag, ready to be piped onto the cake. She squeezed the bag and the icing globed out like a worm.  Plop! Big Fat White Worms! The icing was too thick and it took everything in me not to laugh at her. We could barely spread it and what we could spread, only covered part of the cake. She was mad but as we kept trying to push the stiff icing around the cake, she laughed at the mess and then wondered how we were going to fix it. Now, this is the part I’m good at…fixing things. ANYTHING. If it’s broke, I can MacGyver it! That thick, lumpy icing didn’t stand a chance. I grabbed up the last of the chocolate morsels, popped them in the microwave, and then drizzled it over the icing. Lastly, we sprinkled the rest of the crushed up peppermint on top and Viola! What was once a lumpy, blobby mess, was now a beautiful dessert dish.

It took us all day to bake our goodies and even though we had a couple experimental oopsies, we had a blast hanging out with each other. And that’s what cooking is all about. Hanging out. Having fun. Making memories.

~ SE